
Eric, that most esteemed Tennessee Renaissance Man, knows his way around a grill. Those of us fortunate enough to have attended his legendary birthday parties know that when it comes to grilling tender, succulent chops, the Straight White Grillmeister is at the top of his game... and She Who Must Be Obeyed still raves about a sirloin steak he prepared for her several months ago.
But, until this week, Eric had never tried to grill a whole yardbird. It was left to old Uncle Elisson to show him how.
It may come as a revelation to some folks that chickens may be purchased all of a piece: a whole, fresh (not frozen) bird. Rather than hacking the beast into convenient edible component parts - breasts, thighs, drumsticks and such - the bird’s head is removed and jammed into the empty Entrail-Cavity along with the neck, gizzard, heart and liver (collectively known as the giblets), after which the whole mess is conveniently vacuum-packed in thick plastic film. Whether they call it a fryer, broiler, roaster, or whatever-the-fuck, it’s nought but a whole chicken.
Whole chickens are fine for roasting, or for converting into chicken soup... but it’s another matter entirely when you want to grill them. Their shape does not lend itself to easy grilling, being somewhat akin to a hollow football with wings and legs. But you can fix that.
First, you take the chicken out of its plastic wrappings. (Grilling the bird while it’s still encased in polyethylene does little to improve its flavor.) Reach into the cavity and yank out the giblets while you’re at it. I like to save ’em: the liver can be sautéed in a little olive oil or butter with a dab of sage, while the other bits and pieces can go into the stockpot.
 Now it’s time to do some back-cracking. If you like living dangerously, you can use a meat cleaver, but I rely on my trusty Oxo Good Grips Professional Poultry Shears for this job. The heavy, curved blade cuts through bones with ease, and the whole thing disassembles easily for cleaning.
Lay the bird down with its ass-end facing you and with the backbone on top. Take those shears and cut toward the neck alongside the backbone. Now cut along the other side of the backbone to remove it. Save the backbone for the stockpot.
Now flatten the bird and turn it so its inside is on top. Cut in the center and remove the V-shaped keelbone. You can now flatten that sucker out like a book.
By way of a rub, I took a teaspoon of ground cumin and toasted it in a skillet. To this I added four chopped garlic cloves garlic, a teaspoon of crushed red pepper flakes, and a teaspoon of pimenton (Spanish smoked paprika). All of this went into a mortar along with the juice of one lime (I also like to use lemon, adding the zest as well) and a tablespoon or two of extra-virgin olive oil. After mashing everything together, I rubbed the chicken with the resulting Flavor-Paste and let it sit at room temperature for two hours prior to throwing it on the grill. (Refrigerate it if you’re going to prepare the bird more than two hours in advance.)

A spatchcocked yardbird, ready for the grill.
When it came to the actual grilling process, we got the grill’s temp up to 350°F and placed the chicken on a high grate, well away from the direct heat of the flame. Turning the bird every fifteen minutes or so, it took about an hour to finish it, with crisp, flavorful skin, dark meat cooked through... and yet with surprisingly moist white meat.
It was a perfect companion to the brace of sirloin steaks Eric had prepared... and for the grilled, sliced summer squash, and the roasted asparagus.
They say you can’t teach an oldbird dawg new tricks, but I’ll be surprised if our Tennessee Renaissance Man doesn’t try one of these bad boys again real soon. He’s got the tools for the job.
But, until this week, Eric had never tried to grill a whole yardbird. It was left to old Uncle Elisson to show him how.
It may come as a revelation to some folks that chickens may be purchased all of a piece: a whole, fresh (not frozen) bird. Rather than hacking the beast into convenient edible component parts - breasts, thighs, drumsticks and such - the bird’s head is removed and jammed into the empty Entrail-Cavity along with the neck, gizzard, heart and liver (collectively known as the giblets), after which the whole mess is conveniently vacuum-packed in thick plastic film. Whether they call it a fryer, broiler, roaster, or whatever-the-fuck, it’s nought but a whole chicken.
Whole chickens are fine for roasting, or for converting into chicken soup... but it’s another matter entirely when you want to grill them. Their shape does not lend itself to easy grilling, being somewhat akin to a hollow football with wings and legs. But you can fix that.
First, you take the chicken out of its plastic wrappings. (Grilling the bird while it’s still encased in polyethylene does little to improve its flavor.) Reach into the cavity and yank out the giblets while you’re at it. I like to save ’em: the liver can be sautéed in a little olive oil or butter with a dab of sage, while the other bits and pieces can go into the stockpot.
 Now it’s time to do some back-cracking. If you like living dangerously, you can use a meat cleaver, but I rely on my trusty Oxo Good Grips Professional Poultry Shears for this job. The heavy, curved blade cuts through bones with ease, and the whole thing disassembles easily for cleaning.
Lay the bird down with its ass-end facing you and with the backbone on top. Take those shears and cut toward the neck alongside the backbone. Now cut along the other side of the backbone to remove it. Save the backbone for the stockpot.
Now flatten the bird and turn it so its inside is on top. Cut in the center and remove the V-shaped keelbone. You can now flatten that sucker out like a book.
By way of a rub, I took a teaspoon of ground cumin and toasted it in a skillet. To this I added four chopped garlic cloves garlic, a teaspoon of crushed red pepper flakes, and a teaspoon of pimenton (Spanish smoked paprika). All of this went into a mortar along with the juice of one lime (I also like to use lemon, adding the zest as well) and a tablespoon or two of extra-virgin olive oil. After mashing everything together, I rubbed the chicken with the resulting Flavor-Paste and let it sit at room temperature for two hours prior to throwing it on the grill. (Refrigerate it if you’re going to prepare the bird more than two hours in advance.)
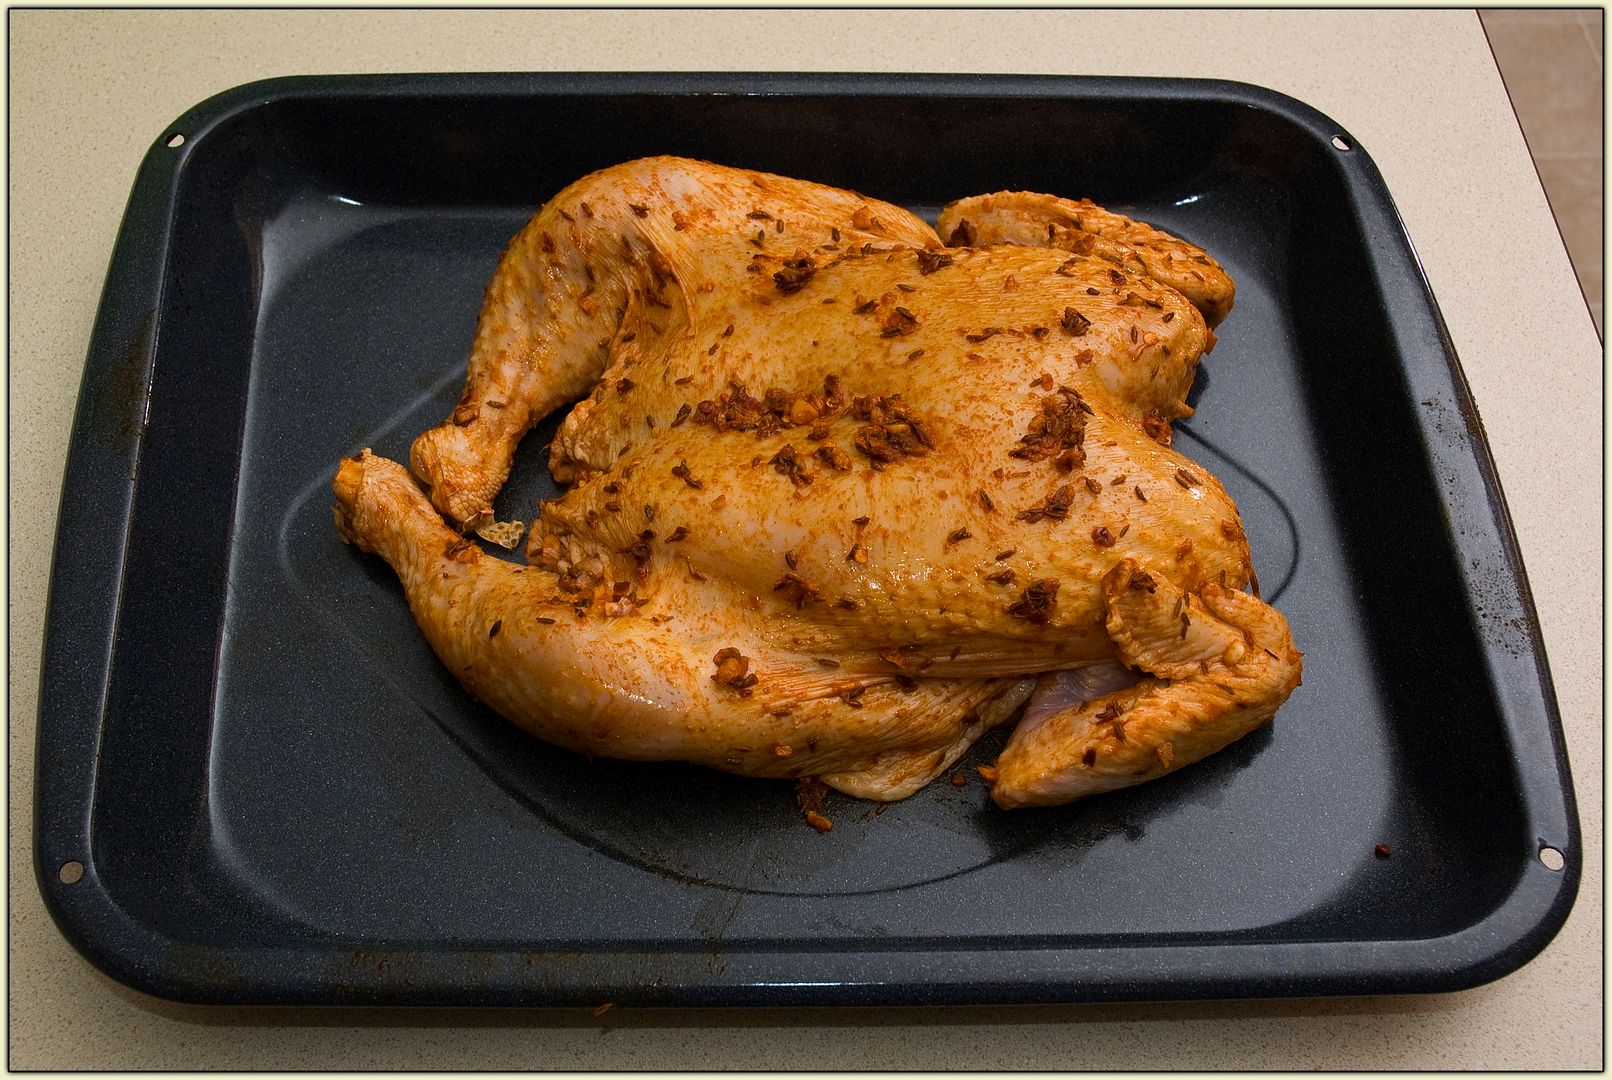
A spatchcocked yardbird, ready for the grill.
When it came to the actual grilling process, we got the grill’s temp up to 350°F and placed the chicken on a high grate, well away from the direct heat of the flame. Turning the bird every fifteen minutes or so, it took about an hour to finish it, with crisp, flavorful skin, dark meat cooked through... and yet with surprisingly moist white meat.
It was a perfect companion to the brace of sirloin steaks Eric had prepared... and for the grilled, sliced summer squash, and the roasted asparagus.
They say you can’t teach an old


No comments:
Post a Comment